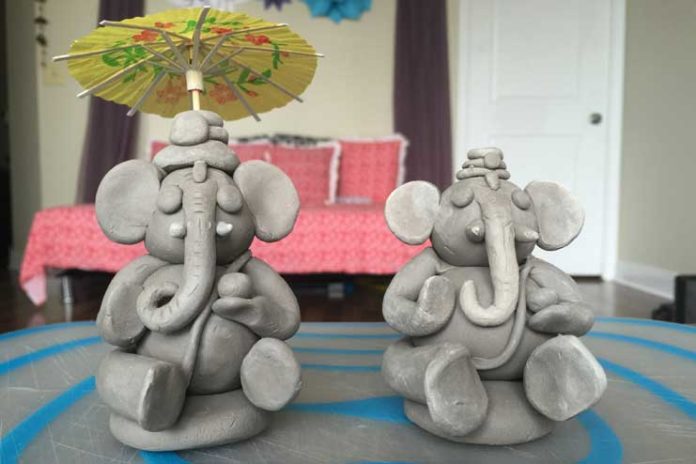
Lord Ganesha!
In order to help you enjoy the festival without any building guilty conscience, we have come up with a very easy yet very enamored rendition of Bal Ganesha that you can make at home yourself this Ganesh Chaturthi that is going to be celebrated starting from September 13, 2018.
Raw Materials You Will Need
- Clay (lots of it, depending on the size of the idol)
- Toothpick
- Acrylic Paint
Total Time Required for Building
- 1 hour to 1 and half hours.
Steps involved in making DIY Bal Ganesh
Step – 1 (Sectioning The Clay Dough)
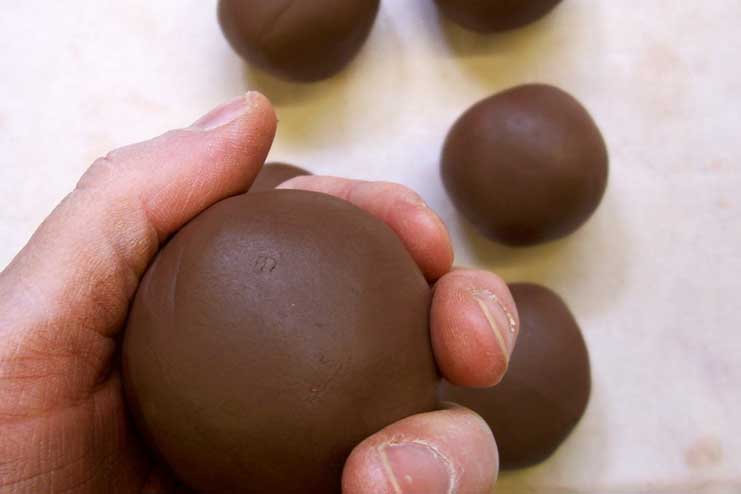
Start off by making sections with the clay that you have. If your clay is too dry and not pliable enough like dough, add some water to make it into stiff dough which you can then work with.
Make sections for each of the parts of the Lord Ganesha idol that you will need. We’ll give you a brief outline for how many sections you will need.
Step – 2 (Pedestal and Stomach)
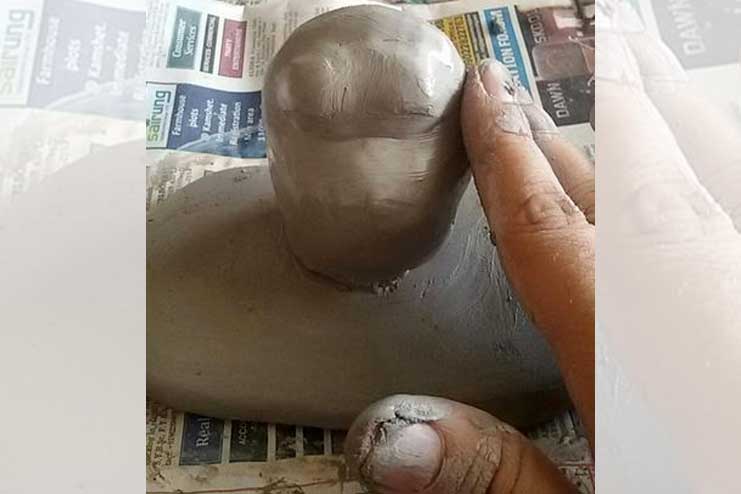
For the pedestal
- Take the sectioned clay dough and flatten it out much like how you would do with the “Chapatis” but not that thin.
- Since we are making a small idol, make sure that the diameter of the pedestal is around 5-8 cms and the thickness should be around 2-3 inches.
For the stomach
- Take the clay dough for the stomach and shape it into how you would envision the stomach region of Lord Ganesha to be.
- Insert a toothpick in the middle, making sure that a 1-2 cm of the toothpick is poking out of the clay.
- Attach the toothpick to the pedestal, inserting it into the pedestal to secure it completely. If you feel like it needs a bit more support, add a few toothpicks more to secure it completely even after it dries completely.
Step – 3 (Making the Legs of Lord Ganesha)
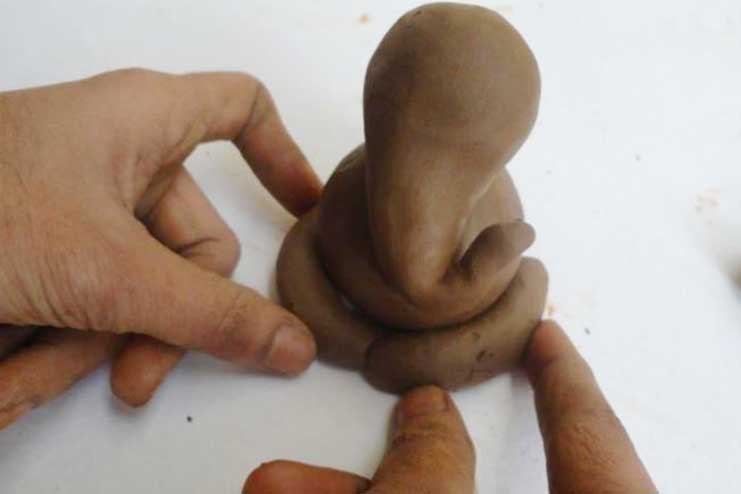
- From the clay dough, take out the ones you separated for making the legs.
- Roll them out into 1 cm thick 4-5 cm long cylinders, tapering it at one end.
- Then, press the top and bottom of the cylinder to make the common shape of the leg as you can see in the image above.
- Some tend to like to like to keep the legs secured towards the inside while some like to keep the feet facing outwards. Do whatever sails your boat.
Step – 4 (Making Hands)
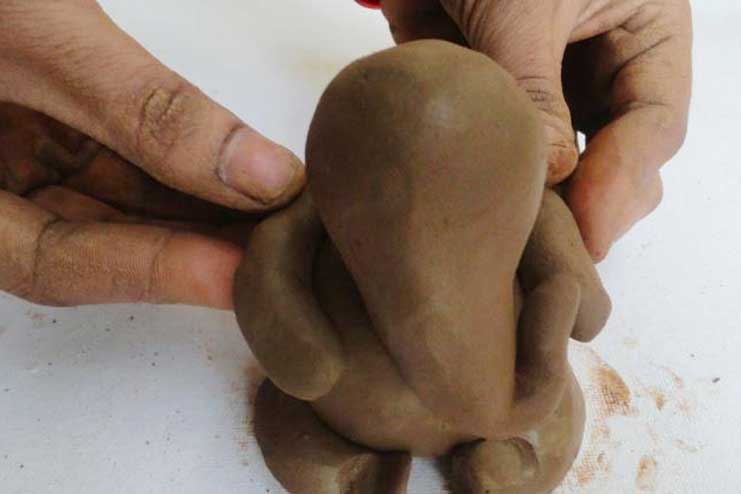
- Much like how you started with the legs, make two cylinders out of the clay dough balls.
- Break the toothpick into two smaller pieces and insert them at one end of each of the cylinder right in the middle. Make sure to insert half of the toothpick into the clay and keep the half out.
- Insert the toothpick into the side of the region of the stomach, making sure to secure the hands around the idol.
- Refer to the image above and do it the same way. Make sure to smoothen out the clay of the hands around the stomach regions so that it all looks even.
Step – 5 (Fixing the hands)
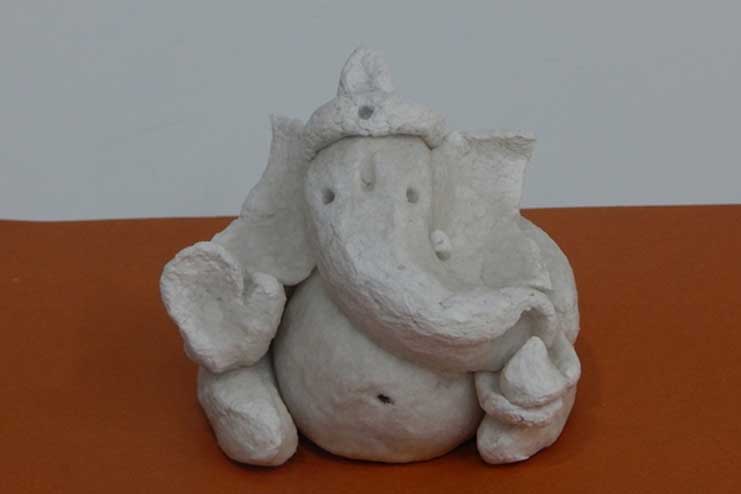
- Start with flattering the edge of the hands, pushing the clay dough back a little bit.
- Push until the clay hits the stomach region. You can keep it just like that or else if you have the crafty skill, you can make the fingers and complete palm to make it appear even better.
The image attached above is just for reference purpose.
Step – 6 (Head and Trunk)
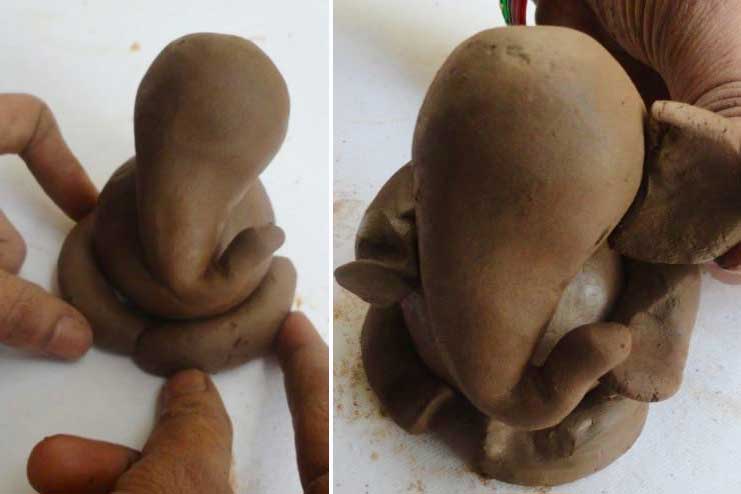
For the head:
- All you need to do is get the designated clay dough and insert a toothpick halfway through the clay.
- With the half of the toothpick that’s poking outside of the clay dough, insert it into the top part of the stomach region where the head would naturally be placed.
- Smoothen everything out with your fingers.
For the trunk:
- Get the designated clay dough for the trunk and rough it into a cylindrical shape first.
- Attach that to the middle of the head of the idol and with wet finger smooth out the trunk where it’s attached so it stays put even after drying.
For the ears:
- Flatten out the clay dough into small discs of 1 cm diameter. Make sure that it is at least 1 inch thick.
- Break the toothpick into small pieces and insert them in the side of the flattened clay discs
- Insert that into the side of the head where the ears would normally be placed. With wet fingers, smoothen the area around the ears.
Step – 7 (Crown and Ornamenting)
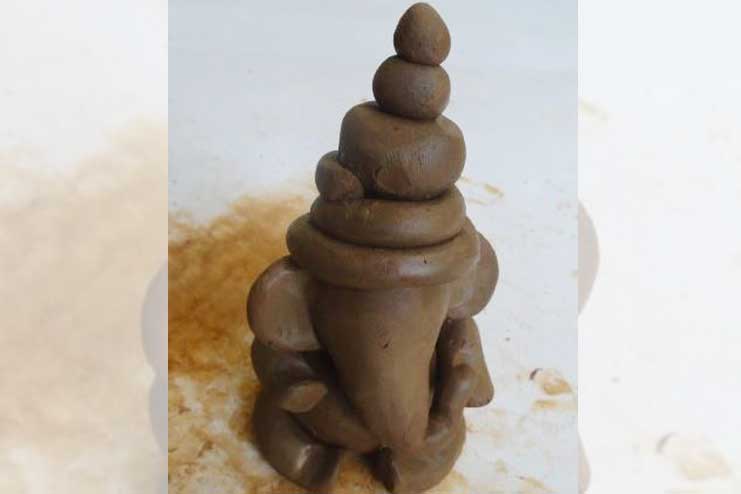
For the shape:
- Once you have the basic structure ready and good to do, start with giving shape to your DIY Ganesha by using your wet fingers and referring to images, much like the one included above.
- Make sure all the attached pieces with the toothpicks are secured well enough so that they stay put even after the clay dries.
For the ornamentation:
- Make the crown for the head and the back crown by rolling the clay balls in ascending shapes.
- Place them one above the other, the biggest one at the bottom. Ensure that each of the clay balls for the crown is secured with toothpicks.
- This method of crown making is possibly the easiest and yet it looks amazing.
Step – 8 (Colour)
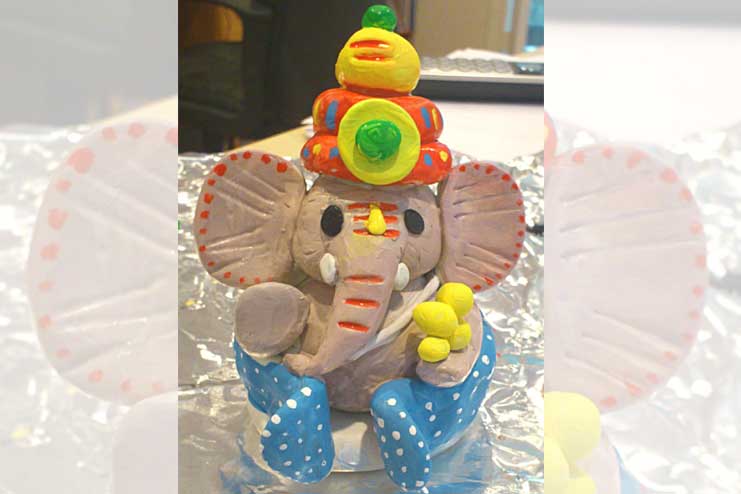
This is the step that is completely up to you and how you want your small and cute DIY Ganesha to look like. Add subtle and subdued colours or even go for the bold and over the top colours, whatever you want.
These are the 8 steps involved into making your very own miniature version of the DIY Bal Ganesha that you can have and keep in your bedside table to be showered with blessings all throughout.
-Somapika Dutta


